Thursday, January 26, 2012

chair makeover!

This project took
For
Ev
Er.
I first saw this tutorial on one of my favorite blogs Young House Love and immediately thought "I can do that!"  And I did.  But it was definitely a long term project-of course most of my projects are. Usually those are the ones that give me the most satisfaction ;)

It all started with this beauty.  Oh the stripes...the...Mauve

not a fan


other than being upholstered in ugly its a great chair; good lines, well made and in pretty good shape-there was one small hole in the fabric and that was easily patched. Its slightly noticeable if you're looking  but not enough to deter me


so after patching (confession: totally hot glued that.)  I got to painting.  The concept is very simple.  You mix in a fabric medium (available at craft stores) with latex paint, give it a base coat and then mix that same medium with acrylic paint in the desired color and give it a few more coats. done.  except that it was about 5 more coats. yeah.  oh you also mist it with water during painting for smooth application-here it is with its first, watery, sheer coat.


This tutorial is nice and detailed and rather than retype everything she said I'll save myself some time as I've already invested countless hours on this chair.

I'll be honest-after about 4 coats I shoved it in a corner and didn't touch it for about 5 months-in that time we also ripped out our kitchen and found out we were expecting baby #2 so I don't feel all that bad about it but once Michael started hinting that he'd really like to have a place to sit down and take his shoes off in our room (our bed is ridiculously high of off the ground) I decided it was time to bite the bullet and finish it.  One or two coats later (i don't honestly remember how many it took other than it seemed endless) I deemed it done!  I also painted the legs a glossy black

I apparently have a nice camera for no reason - since half theses pictures are from my iphone...


And at long last - put it in the corner of our bedroom by our closet. 
 My thats a sexy  chair-lets see it from another angle shall we? 

 meeeoww....
Michael really does use it every morning (as long as I haven't piled laundry that I need to hang up in it) and tells me frequently how much he likes having it in there so I guess his gratitude is enough to make it worth it :)

If you're wondering how that patch job turned out heres a closer look


cant see it?  Me neither unless you get reeeeally close
 

you can also see in this picture that the stripes left a little texture that I actually like-and also painting it does change the feel of the fabric-it feels alot like canvas but its still very comfy.

overall I deem this project a success! But I'm more excited to say its finished-finally!


Friday, January 20, 2012

What are we doing with the temporary kitchen room you ask?

Why transforming it into a beautiful nursery of course!

(Need a reminder of what it looked like? click here) The room has already been prepped for paint and I've already mentally decorated it-here is what it looks like at the moment:


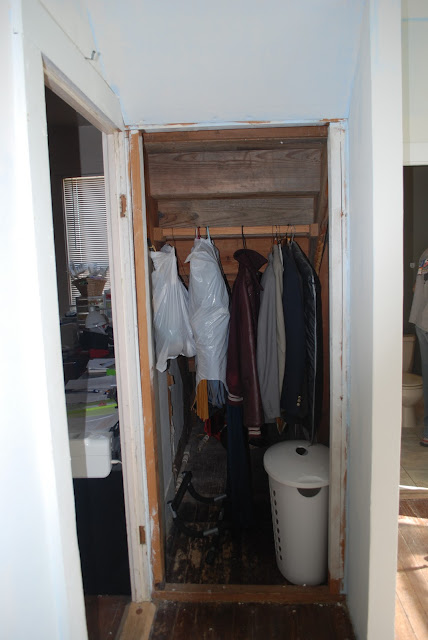
this room will be a little different from our usual gut jobs.  We decided to do a semi-temporary fix. eventually when it is its 'turn' we'll build in storage under these stairs and a closet in the corner.

But we have a bathroom and the backroom/den that connects to the kitchen to do first so it could be at least a year before we get to it.  I am totally ok with not looking at the weird silver 'mural' the previous owners created for another year...imagine my surprise when I couldn't find a good picture of it-why WOULDN"T I want to document that masterpiece!  Here are a few glimpses of it


 Try not to get distracted by the epic cuteness and concentrate on the epic ugly behind it-for awhile it served as Gwen's 'art wall'  in an attempt to downplay just how awful it was..it looks like the wall has a hairy chest...


At 8x10 this is the smallest bedroom in the house (the others are roughly 11x13) and might serve as a playroom or guest room at some point.  That knowledge gave me the liberty I needed to get the Maskros light from Ikea that I've been in love with! That paired with soft pink and deep gray make me do a little happy dance...
(I went ahead and made another mood board for little Ivy's room since I found it so helpful in the kitchen)

The biggest downside, however, to this being the baby's room is that the only functional bathroom in the house is through that door.


and um-i lied a little bit when I said here is what it looks like "right now" - it actually has its first coat of pink paint-"delicate Bermuda shell" is what its called-kind of a lame name if you ask me- but whatever


which means the next room on the agenda will have to be this one...


This will serve as the 'public' bathroom, as in, the only one accessible without walking through a bedroom and will also end up housing the washer and dryer since our current laundry room will someday be part of the living room.  Big plans people. Big plans. Right now its just a big mess-lets just close that door again


Thats better.


The crib and dresser we bought for Gwen are cherry wood. I am itching to paint them...I would really love to give this dresser a coat of glossy yellow and maybe the crib  but I first have to convince My Loving Man its a good idea ;)

yes i'm aware Its covered in hair supplies

I have a rocking chair that needs a coat of paint too but I'm thinking a chalky light gray might be a nice addition to the yellow furniture-or maybe the bed in gray and the chair yellow?

Whats your vote?!

I am quite pleased to be able to create a space for our little Ivy.  I was expecting to have another ugly room with pretty things in it (i'm talking to you living room : / ) So the idea of another room I love is just...well..lovely! 

Saturday, January 14, 2012

Happy New Year! and um Merry Christmas...

We had a wonderful (and busy) holiday season! I'll just pretend like that is why I haven't updated but really I just didn't want to...sorry...

Before we jump right in lets talk a walk down memory lane shall we? 
The Kitchen, Before:

And here it is now!
 Complete with counter-tops and beautiful floors!
 Michael did the stainless steel himself and it was quite a job (at least from what he tells me) It was much more difficult than he (we) anticipated but (I think) well worth the result!  Would we do it again? I'm not sure...in reality they are not *quite* finished.  We still need to weld the corners together-as is they are razor sharp and covered with tape to prevent finger and forehead slicing! I am really loving them though-especially with the brick.

We also have installed the shelves I say 'we' because I really did help with this one! 
I was the "no up a little on the left...a smidge more..no too much go back..." human level component. 
very important.
Just this little step has really brought the whole thing together-the (primed, unpainted) trim around the doors really helps too.  And the running water. That part is like music to my ears-especially because I look like this now:
and have no business bending over a bathtub washing dishes.  Having that experience has made me extra thankful for a sink though!

The table has also been redeemed  from temp kitchen workhorse to its proper function and we have been able to eat our meals AROUND A TABLE again! Its the little things.

So I've moved out of our temp kitchen into this beauty and it is just SO EASY to make meals and function as normal! Seriously don't take that stove for granted ladies!!!!  It was fun to organize and decide how my new kitchen would best function 
I have all these neat features to work with!  


 There are still things to do, granted, like install the oven hood and lighting and wire the island for a dishwasher
( its future home!)

and various finishing touches.  I wont pretend I don't pause throughout the day to just look at it and do the  "grin in ecstatic delirium at inanimate objects" thing.
Don't act like you don't know what I'm talking about.